Home My Classroom My Products Freebies Instagram TeachersPayTeachers Bloglovin Pinterest Email Image Map

10.24.2014

You Oughta Know About Virtual Field Trips!


A couple of years ago, my district did away with out-of-county field trips because of gas prices. Then they cut back on field trips even further because they had to align directly with the standards. So this year I've been looking at virtual field trips. No, there isn't a bumpy bus ride or parents coming along as chaperone; but it can still be a lot of fun.

Some ideas to make your virtual field trip more exciting:
  • Let students bring a brown bag lunch and eat outside
  • Take lots of pictures just like you would on a real field trip
  • Have students keep a journal where they write ideas, feelings, and things they learned during your virtual trips.
  • Link up with another class from the location of your virtual trip. Exchange letters or post cards beforehand. Get your class exciting about "visiting" their town.
So where can you go on your virtual field trip? Visit a rain forest or the desert. Check out an amazing zoo or museum. See beaches or mountains or even a volcano. How about watching an orchestra perform or strolling the streets in a historic town? There are so many sites you can visit online. Just project the video or virtual tour so everyone can see. 

My favorite virtual field trip is this amazing interactive tour of the Smithsonian Museum of Natural History. 


On this tour, you can wander through every exhibit on all three floors. You can also go outside and view the gardens. As you work your way through the museum, you can zoom in to read all of the placards and signs. There are little camera icons called hotspots that you can click on to see something in greater detail. The best part of the tour is the 360 degree viewing capability. By dragging the screen with your mouse, you can view the entire room - even the floor or ceiling. Another great feature is the ability to visit past exhibits that are no longer on display.

I suggest starting the tour together as a whole group and then letting students have an opportunity to explore the museum themselves on ipads or computers. You could even send them on a scavenger hunt to find certain things or bits of information. Each wing and room of the museum is marked which makes it easy for students to record where something is located.

Here are some other interesting virtual tours and field trips:

10.14.2014

My #1 Problem Solving Strategy for Division Problems

Are you using tape diagrams in your classroom? If not, read on for my #1 problem solving strategy...

I have always encouraged my students to model, model, model when solving story problems. Modeling is a way for students to make sense of a problem and catch mistakes before they happen. Sometimes, what seems like a good answer just doesn't work out once it's drawn as a model. 

Until recently, I really didn't care what kind of model my kids used. Drawings, tally marks, symbols: anything was fair game. But as we've worked our way through multiplication and into division, I've found myself returning over and over again to the tape diagram. It's a nearly fail-proof way to work through a story problem and my students have become problem solving masters - the best I've ever had the pleasure to teach, in fact!

So, what exactly is a tape diagram? It looks like this...


To use a tape diagram, students must first ask, "Do I know the whole amount?" If supplied by the problem, fill it in. If not, put a question mark at the bottom of the diagram. Then look for other information and fill that in. The question mark always represents whatever piece of information is missing.

Students will quickly begin to see a pattern... the bottom number is always the product of the top two numbers. Therein lies the beauty of this model. 1) It can just as easily be used for multiplication problems and 2) it is self-correcting. If the top two numbers, when multiplied, do not equal the bottom, you've done something wrong.

When teaching with this model, a good idea is to have students write all four possible equations. So in the above example, we would also write ? x 4 = 32 and 32 ÷ ? = 4. This is important because it reinforces the concept of inverse operations and fact families. It also gives students a tool to use when the encounter problems with a missing factor or divisor.

Once students are able to interpret story problems and solve using tape diagrams, I teach them to analyze a tape diagram and write their own story problems to go with it. This requires high-order thinking and really develops their mathematical minds.

To use tape diagrams with your students, I suggest following this instructional sequence...
  • Teacher supplies the story problem, draws the tape diagram, and models how to solve.
  • Teacher supplies the story problem, draws the tape diagram, and students help solve.
  • Teacher supplies the story problem, students help draw the diagram, and students solve on their own.
  • Teacher supplies the story problem, students draw and solve alone.
  • Teacher draws a tape diagram and students create a story problem to go with it.
Along the way, you will want to move from including one equation that represents the problem to showing all four possible equations. This process, from introduction to proficiency, may take several weeks depending on the skills of your students. But it will pay off in the long run when your students become experts at deciphering and solving story problems.

If you're interested in teaching this strategy to your students, you may want to check out this resource:


10.12.2014

Is it fall yet?

What a busy week I've had! Meetings, testing, more meetings, more testing... you all know how it goes. I've neglected my blog but let me at least dig up this old post from my old blog. It's perfect for this time of year:

Fall is in the air...just not here in Florida. It's still around 90 degrees every day. But the humidity is down very slightly, so I'm going to pretend that fall has arrived! It's the best time of year and there are so many fun things you can do at school to celebrate the season. One thing I love to do with my class is make applesauce. It is super easy! You can make it in your crock pot and your classroom will smell delicious all day long. Here's all you need...


Peel, core, and slice about 12 apples (whatever will fit in your crock pot). Add 1/4 cup water. Turn the crock pot to low, cover, and let cook all day. Check periodically to make sure the apples aren't sticking. They will make their own water, so I've never had an issue with this. An hour before you plan to serve the applesauce, check to see how soft they are. If still firm, turn the crock pot up to high.

When the apples are soft and you're ready to eat, turn off the heat, pour off a little of the water if the apples made too much, and stir in 1/4 cup sugar. If you used tart apples, you might want to add a little more. Sprinkle in a little cinnamon, too. I never measure this. I just add it to my personal taste. I've noticed that with second graders, less cinnamon is better than more. To make the applesauce extra special, you can also add a few drops of vanilla extract. Yum!!


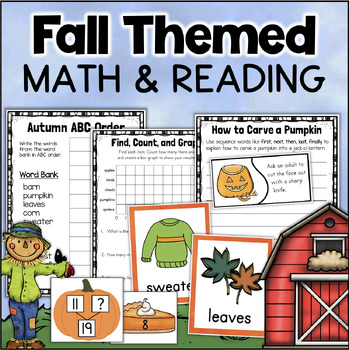
Looking for more fun fall activities for the classroom? Check out these...

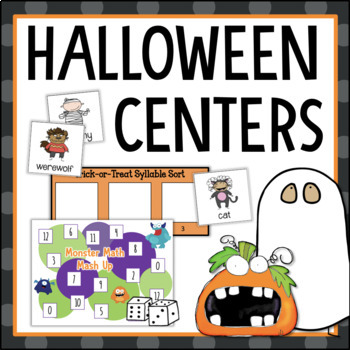
Halloween Centers

10.01.2014

Spoons in the Classroom

When I was a kid, one of my favorite games was Spoons. It was something I often played with my youth group friends on long bus rides to Bible Bowl tournaments. It was the perfect game because you can play with any number of people, all you need is deck of cards and some spoons (or any reasonable substitute), and the rules are simplistic.

I had pretty much forgotten about the game until recently, when I was trying to think of some activities for indoor recess days. Getting out the board games can be messy and I hit my limit for 4 Corners about mid last year. So, this week I decided to teach my class the joy of Spoons. Here's how to play...

The object of the game is to get 4 of a kind and not be the player left without a spoon. You will need spoons (1 less than the number of players) and a set of cards. 

To begin, place the spoons in the center of the table and deal 4 cards to each player. The rest of the deck is stacked face-down beside the dealer. Play starts with the dealer drawing a card from the deck and passing one from his hand face-down to the player on his left. That player takes the card, decides whether he wants to keep it or not, and passes a card from his hand to the next person.

Each player does the same as quickly as possible. The last player before getting back around to the dealer, starts a discard pile with the card he is getting rid of.  It is then the dealers turn again to draw a card from the deck and start passing. Players should have 4 cards in their hands at all times.

Play continues until one person ends up with 4 matching cards in his hand. At that time, he takes a spoon from the table. He may either try to sneak it away or grab it quickly. Either way, when the other players notice, they too will grab a spoon. The player left without a spoon is out. The game continues until one person is left who is then the winner. If the deck runs out of cards during the game, players should shuffle the discard pile and then continue.

Here is a video showing a group playing the game: 


Fun, right? My class absolutely loved it and now they keep asking to play. The problem is that we don't actually have time to play all day. I mean, we DO have to learn sometime. Well luckily for them, I realized I could turn Spoons into an awesome review game for all kinds of skills. How about collecting four synonyms or four related math facts? What about four words with the same phonics pattern? The possibilities seem endless!


Now I feel inspired to start adapting other games for the classroom. After all, shouldn't learning be fun?
Related Posts Plugin for WordPress, Blogger...